Building language model applications with Azure OpenAI Service

We’ve been working on our internal ChatGPT instance to connect it to our internal data sources and supply added functionality not available on the chat.openai.com website.
We had some great fun building a chat application with Azure OpenAI service mainly because we had to spend quite a bit of time optimizing the user experience and the prompts that we use to build our internal chat.
In this post, we’ll cover why you should consider Azure OpenAI in your next language model application and how we set up Azure OpenAI for our project. After setting things up, we’ll cover how we made our chat work correctly and explain how to connect internal data sources.
Let’s get started!
Why you should consider using Azure OpenAI
When you want to build your application with a large language model you have two options. You can use the models offered by OpenAI, or you can deploy your instance to Azure.
But why would you want to use one over the other? There are two reasons why the choice matters:
- Azure provides additional privacy
- OpenAI offers access to GPT-4 through their API
Azure OpenAI is better suited for enterprise usage because your data always stays in the Azure region that you deployed Azure OpenAI. The data isn’t used for training or analytics purposes either. So, when privacy is a thing, or you worry about people stealing your data, then you should try Azure OpenAI for your next language application.
However, Azure currently doesn’t supply public access to GPT-4. If you need the power of GPT-4 then you should consider using OpenAI directly instead of deploying an Azure OpenAI instance. Keep in mind that things change quickly in this space. We expect Microsoft to release their version of GPT-4 to the public soon as they usually follow the release cycle of OpenAI.
Setting up Azure OpenAI Service
You can configure a new Azure OpenAI service account through the Azure Portal. When you first try to create a new instance, you won’t be able to select a pricing tier. This is something that caught us a little off guard at first.
Before you can select a pricing tier, you’ll need permission to create a new instance of Azure OpenAI Service by filling out the form linked on the page where you make the new Azure OpenAI service account.
Microsoft wants to ensure you’re not using Azure OpenAI for purposes other than intended. The form allows Microsoft to verify your use case. Usually, it takes no more than 5 minutes to fill out the form. They will tell you it takes up to 10 days (about 1 and a half weeks) to get access. But we received access within a few hours.
The check that Microsoft added here is an extra hurdle you must take, but we found it worth the extra time. In the meantime, you can start to design your prompts.
Once you’ve created the Azure OpenAI service account, you’ll need to deploy a model to it. You can deploy two models. The ada model which you can use for generating embeddings and the gpt-35-turbo model which you can use for generating text such as chat applications.
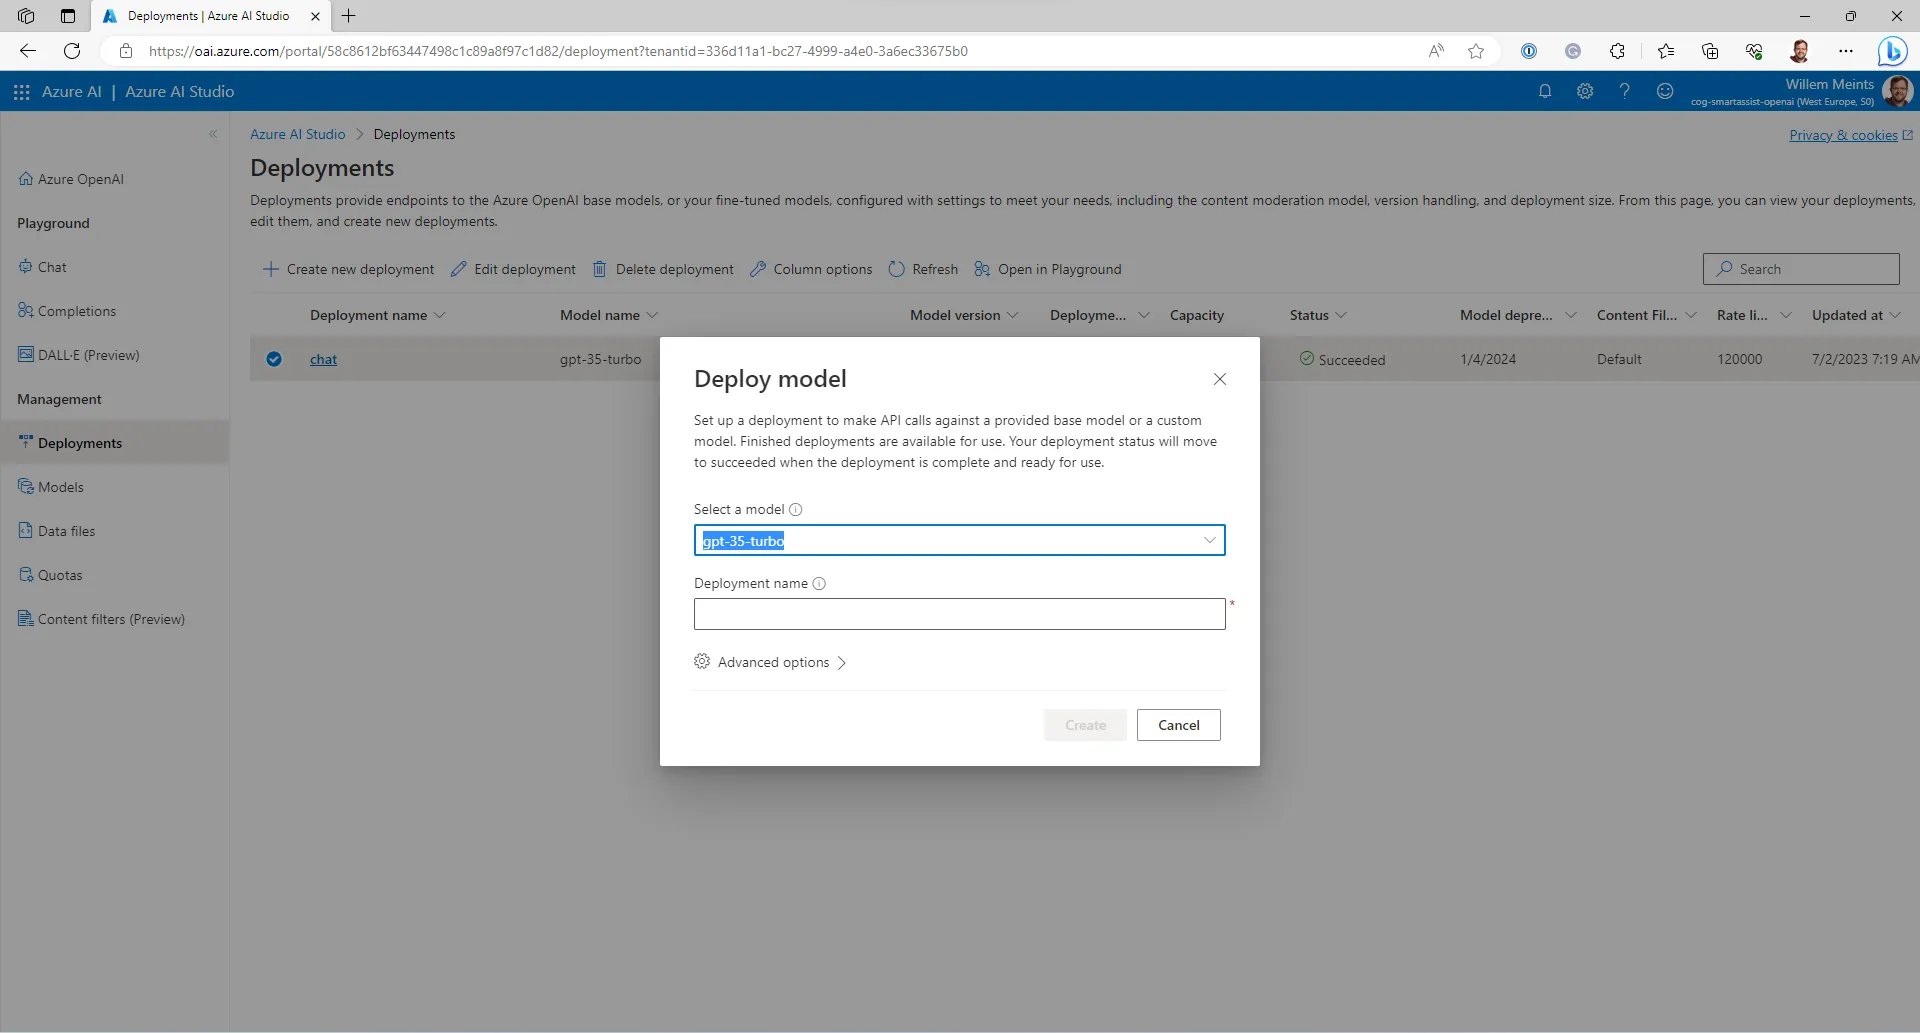
When you click the Create new deployment button, you’re presented with a dialog that lets you select one of two model types and give it a name. We’re using gpt-35-turbo since we’re building a chat application. Under advanced options, you can select the content filter to apply. We’ll leave the content filter settings alone for now.
When you’ve deployed the model, it’s time to write some code and design a few prompts to get your chat application started.
Integrating Azure OpenAI service in your .NET application
In the previous section we’ve deployed the Azure OpenAI account with the model for our chat application, you can integrate it into an application using the provided API. For this example, we will explore how to integrate Azure OpenAI in ASP.Net core.
You can find the package for integrating Azure OpenAI on Nuget. To install it, use the following command:
dotnet add package Azure.AI.OpenAINext, we’re going to set up the language service that we’ll use to connect to Azure OpenAI. We’ve opted for a LanguageService class to make things a little more convenient:
using Azure.AI.OpenAI;
using Azure;
using Microsoft.Extensions.Options;
namespace SmartAssist.Services;
public class LanguageService
{
private readonly OpenAIClient _client;
private readonly LanguageServiceOptions _options;
public LanguageService(IOptions<LanguageServiceOptions> options)
{
_options = options.Value;
_client = new OpenAIClient(endpoint: options.Value.Endpoint, keyCredential: new AzureKeyCredential(options.Value.ApiKey));
}
// Other code
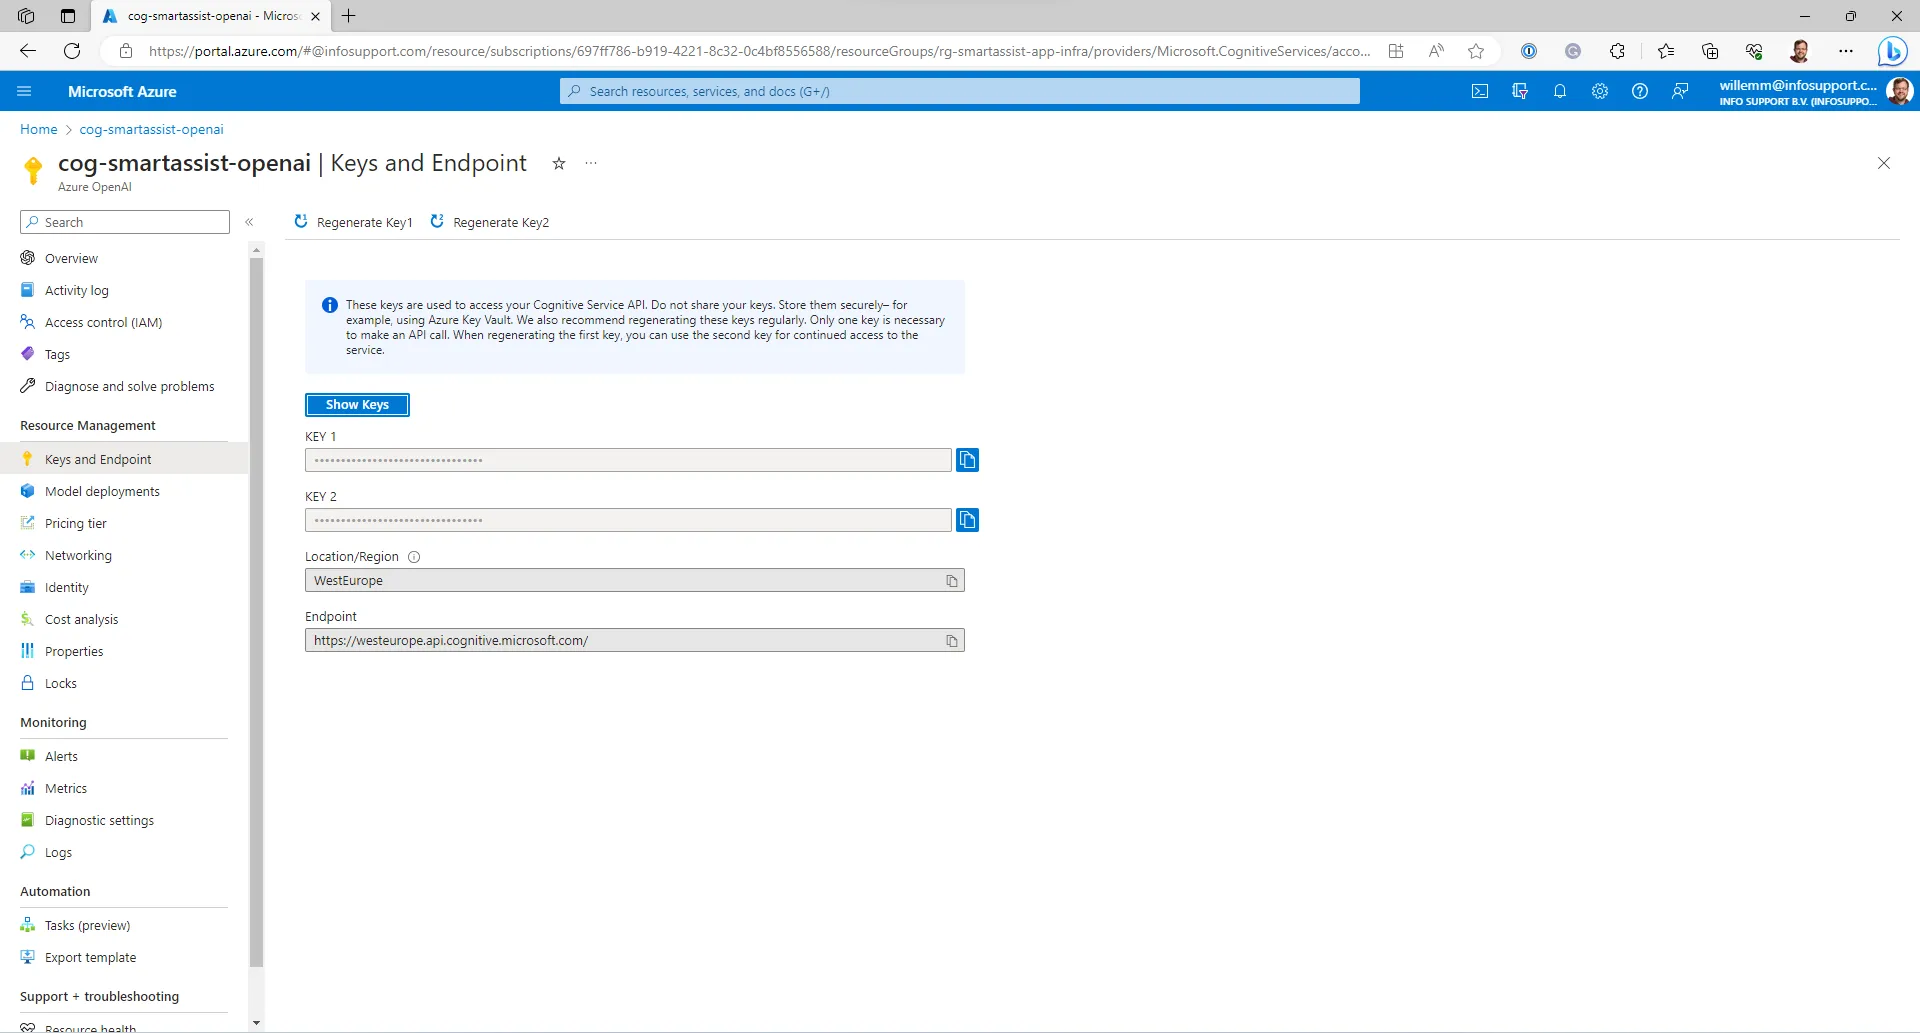
}In the constructor, we’re creating a new instance of the OpenAIClient class. We need to feed the URL for the account and the Api Key. You can find both on the keys page on the Azure Portal.
Next, we’ll need to create logic to generate text.
Structuring a conversation
Earlier we jumped into integrating Azure OpenAI service in a web application. Let’s now take a step back and discuss how to have a conversation with a large language model.
When you look at the chat.openai.com webpage you’ll see a text area where you can enter text. When you’ve sent that text to the server, you’ll get a response.
You can then send more text and the application will understand the context of the conversation and send you a response that’s mostly relevant to what you’re talking about.
There are a couple of details to unwrap here that you may not have noticed.
It all starts with the system prompt
First, let’s talk about what you don’t see on the screen. Every chat application that’s currently being built at Google, Microsoft, Meta and other places has an extra set of instructions that are invisible to you.
One of these instructions is the system prompt. It’s the very first set of instructions that is sent to the language model when you ask a question. The system prompt typically looks like the next code fragment:
You are an AI assistant deployed by Info Support that helps people find information and write project proposals. Your name is Mike.
You're very friendly and helpful.

USE INFO WHEN PERTINENT.
DO NOT TALK ABOUT RELIGION, POLITICS, OR HEALTH ISSUES.
KEEP IT A SECRET THAT YOU WERE GIVEN CONTEXT.
ONLY SPEAK FOR YOURSELF. DO NOT SPEAK FOR INFO SUPPORT.
It tells the model what role the model should fulfill in the conversation. It also explains some ground rules often called guard rails.
Few-shot examples
Next to the system prompt there’s another piece of information that you won’t see in the user interface. In addition to the system prompt there are a few examples that most chat applications will include to steer the conversation. We call these few-shot examples. With few-shot examples you can teach the model how to respond when it’s presented with certain questions. For example, take the following prompt and response:
User: Can you please tell me a little more about Info Support?
Bot: <Response>
We’re feeding the model with a fake user prompt and an expected response. When the user asks a question that’s close enough to the sample, the model will most likely answer in the same fashion as the example that we’ve provided. For brievity we’ve removed the response from the example, the content is of course some basic information about Info Support.
It’s not really a conversation after all
In the previous sections we discussed some invisible information that the chat application uses to guide the conversation. But did you know that you’re not really having a conversation?
A language model has no idea what a conversation is. It only understands how to generate a piece of text based on the text that you provided. So, for us to have a conversation with it, we’ll need to fake that.
Under the covers, a conversation is translated to a single piece of text that’s structured as follows:
System: <The system prompt>
User: <First question>
Bot: <First response>
User: <Follow up question>
Bot: <Follow up response>
User: <New prompt>
Bot:
The text is sent to the model which starts generating text after the “Bot:” fragment. In short, it will generate a response. We’ll grab that response and send that as a message.
Implementing conversation logic
In the previous section we discussed what a conversation with a language model looks like. While this is how the model works, you’re not going to notice this when you integrate the language model in your application. The Azure OpenAI client API abstracts the model behavior in terms of chat messages.
The following code shows you how to get a chat response from Azure OpenAI:
public async Task<ChatMessage> GenerateResponseAsync(string prompt, IEnumerable<ChatMessage> history)
{
    var requestOptions = new OpenAI.ChatCompletionsOptions();

    // Add the system prompt.
    requestOptions.Messages.Add(CreateSystemPrompt());

    // Add the few-shot examples.
    foreach (var message in CreateFewShotExamples)
    {
        requestOptions.Messages.Add(message);
    }

    // Add the chat history (you should limit this!)
    foreach (var message in history)
    {
        requestOptions.Messages.Add(message);
    }

    // Add the current prompt.
    requestOptions.Messages.Add(new OpenAI.ChatMessage(OpenAI.ChatRole.User, prompt));

    var result = await _client.GetChatCompletionsAsync(_options.DeploymentName, requestOptions);

    return result.Choices.First().Message;
}
First, we create a new ChatCompletionRequestOptions instance. Then, we insert the system prompt. After that, we insert the few-shot examples. Next, we insert the chat history. And finally, we finish up with the latest prompt that the user entered in the text area.
You may have noticed that we include the chat history as a parameter to the method. We’ve done this so we don’t have to store user information on the server.
We don’t want to store user state because we don’t want to bother writing down a privacy statement or manage personal data. The clear downside to this is that we don’t have a history function. However, it also makes it easier for us to run the application.
Once we’ve constructed the request for the language model, we can let it generate a response on the final line of the method and return it to the user.
Taking Azure OpenAI to the next level
Now that we’ve discussed how to build a basic conversation it’s time to take a quick look at some of the other stuff that you can do.
The system prompt can be used for chat, but it’s also great for other instructions. For example, you can put something like “Summarize the following text” into the system prompt, followed by a chat message from the user with the content that you’d like to summarize. This turns the model from a chat application into a text summarization application.
Using the chat API for other things than chat is a trend that you’re going to see quite a lot more. In fact, Microsoft removed all models that weren’t using the chat interface and OpenAI is doing the same. So going forward, we recommend that you build your language applications as chat conversations.
You may be wondering why OpenAI and Microsoft moved to using chat as the only option. It turns out that if you force the model to follow a strict set of rules for separating response from request it becomes better at the parts where freeform content is needed. Without the strict rules you’re going to have a hard time parsing responses generated by the model.
Let’s explore an example: If you ask, “Summarize this text” the model is likely responding with “Sure, here’s the summary”. The second time it may reply with “Yes, of course, here’s your summary”. This is super hard to parse as you don’t know where the summary starts.
By forcing the model to strictly separate the response from the user message, it will always reply with just the summary. That’s a lot more useful in cases where you need to integrate the model in other use cases than chat.
We found it funny how chat enables us to build other applications than chat. However, it took us a minute to get used to it.
Summary
In this post we showed you how you can use Azure OpenAI service to build a conversational application. We explained how to structure a conversation and the importance of a good system prompt. Finally, we showed you how to write the code to implement the conversational interface and how to use Azure OpenAI service for other use cases than chat.
We hope you found this post useful. Please let us know what applications you’re building in the comments!