How to build a game with Unity - Part 1

Welcome to this new series of blog posts about building a game with Unity. In this series we’re going to explore a fun vacation project that my son and I worked on in summer 2022.
In this first blogpost we’ll go over our initial design process and how to set up Unity on a Windows computer. We’ll cover the following topics:
- Why start building a game?
- Setting up unity
- Designing the basic structure of a game
Let’s start by discussing why we started building a game.
Why start building a game?
Most people who’ve read my articles will know that I often work on ML solutions and enterprise solutions for my work. I’m spending a lot of time explaining tools to build microservices or ML solutions.
While that’s fun, I can assure that building a game with Unity is even more fun! For me there were two reasons to build a game:
First, the kind of problems you run into when building a game are just different. You have to think about performance more, and you have to come up with solutions to things like hit-testing, computer controlled players, and more.
If that’s not reason enough, another reason to build a game is that you get to play with what you made. The Unity editor is super friendly when it comes to testing your work. You click play, and you’re in the game. My son found this to be the most fun way to learn about building stuff.
Not everyone has kids who are into computers. My youngest son absolutely hates computers. But my eldest has been asking about programming ever since he could control the mouse. He can’t read yet, but we’re having a ton of fun debugging the game and building the levels in the game. You don’t really need to be able to read to design a level in Unity.
Let me show you how to get started building a game in Unity.
Setting up Unity
You can download from [the website][UNITY_WEBSITE]. When you install Unity on your machine you’ll get the Unity Hub. The setup will also ask you to install at least one release of the Unity Engine.
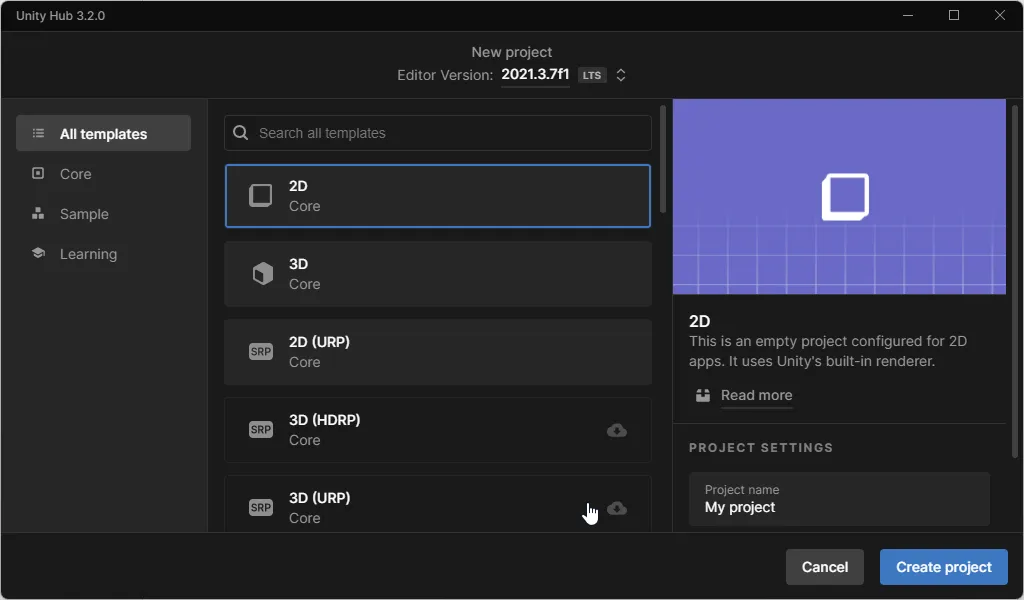
Once you have Unity installed you can create a new project from the Unity Hub.
Creating a project

The hub features a number of templates to choose from. There are a set of core templates that you can use if you want to start from scratch. Alternatively, you can choose from one of the learning templates. The learning templates are great when you want to learn how to build a particular kind of game.
For our game we choose to go for the 2D template. This template configures the engine with a 2D scene and a default camera.
Before we look at the game, let’s explore the editor for a bit.
The editor layout

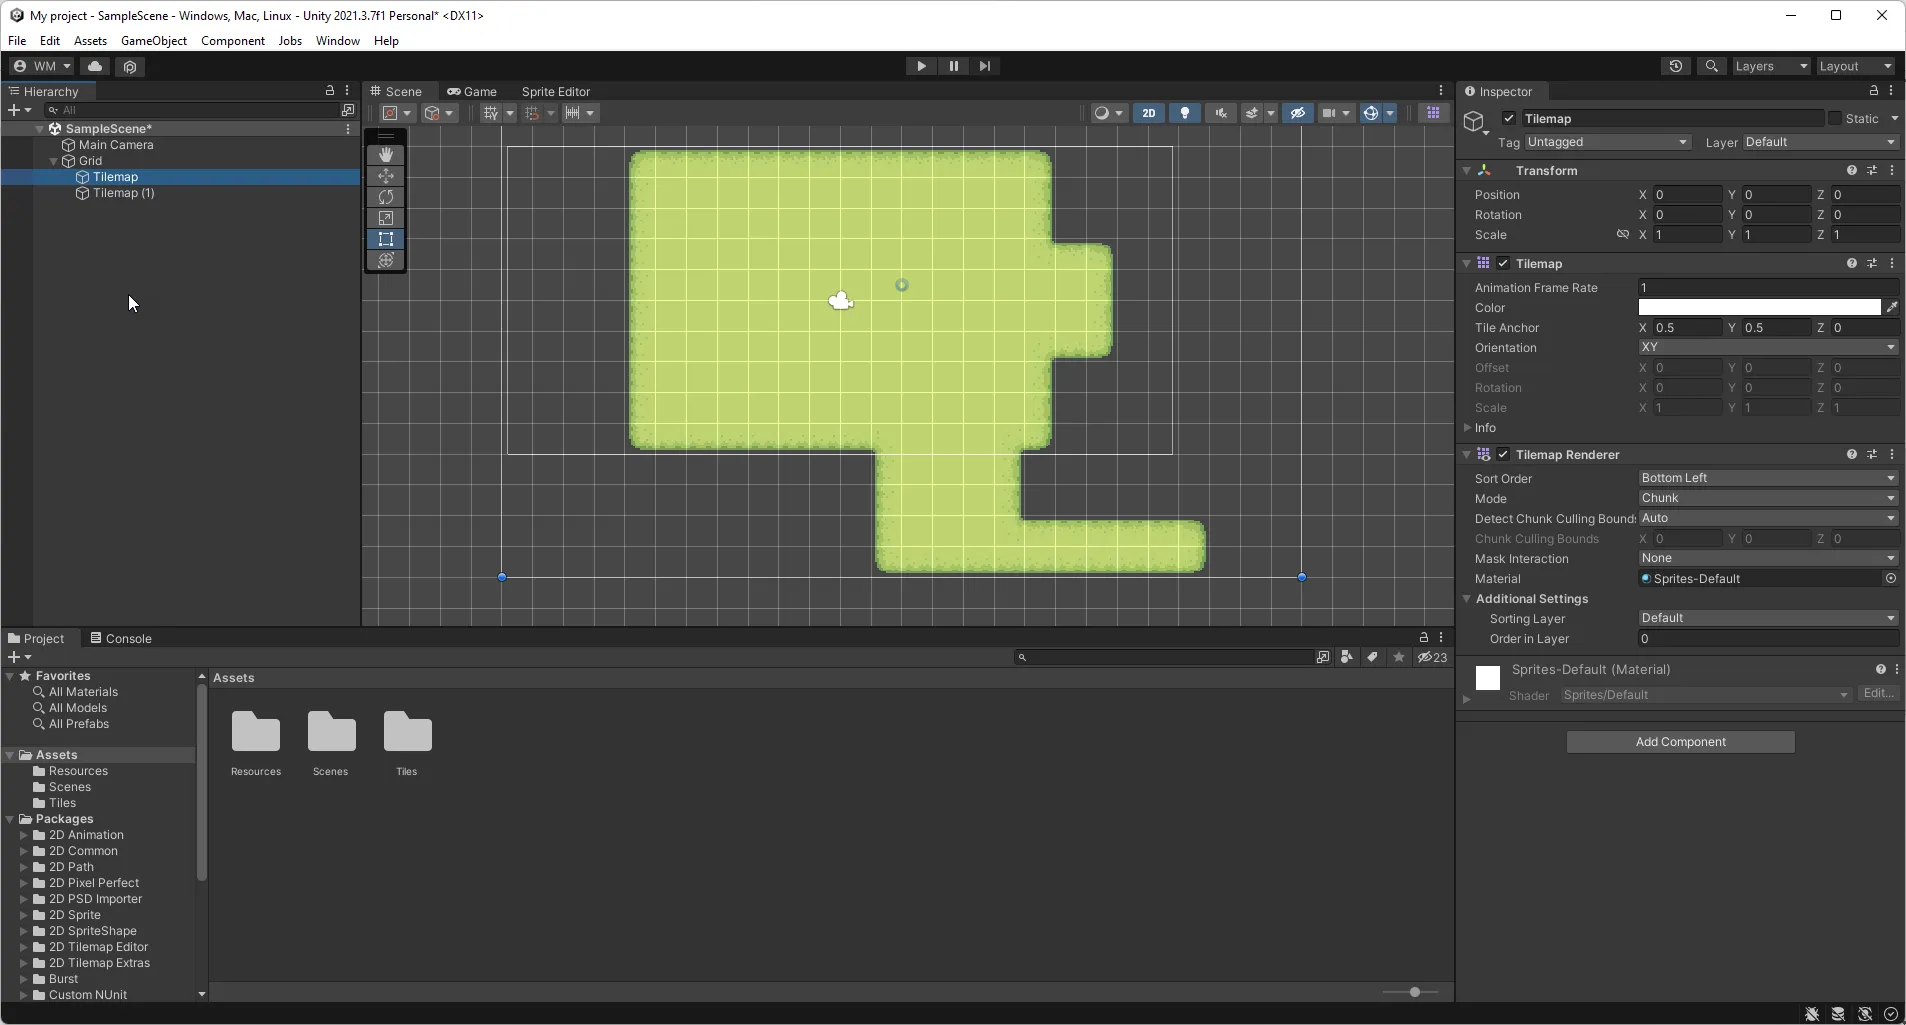
The editor screen starts with a default scene. The screenshot shows our game as an example. The scene is build out of a hierarchy of objects that you can see on the left side of the screen.
Unity uses game objects that have various components attached to them. Each game object typically has a renderer, a collider, and a rigid body. The components vary based on what you build. Each object can have one or more scripts attached to it to control its behavior.
The bottom of the screen is occupied by the project window. This window shows all the assets and packages used in the project. The project window is essential as it shows you all the images, sounds, animations, and other things you need to build the game.
The right part of the screen contains the inspector. You can use the inspector to configure the selected game object or project asset. This is where you configure the properties and modify behavior.
Now that we’ve seen what the editor looks like, let’s take a look at the game we’re going to build.
Designing the basic structure of a game
Before you can even start doing cool things it’s good to decide on what you’re going to build. I’ve tried building something in Unity before and got stuck because I didn’t spend enough time coming up with a good idea first.
Deciding on what sort of game you want to build
Full disclosure, I have limited experience in building a game. My son and I just started discussing some ideas and concluded that a farming game would be the most fun game to build.
We asked ourselves a couple of questions before we started:
- Do we want 3D or 2D?
- What is the goal of the game we’re building?
- What does the gameplay look like?
I decided that our best option would be to start with a 2D game. I think 3D is fun, and I have some basic experience designing models, but I am miles away from being a good designer.
Choosing a graphical style
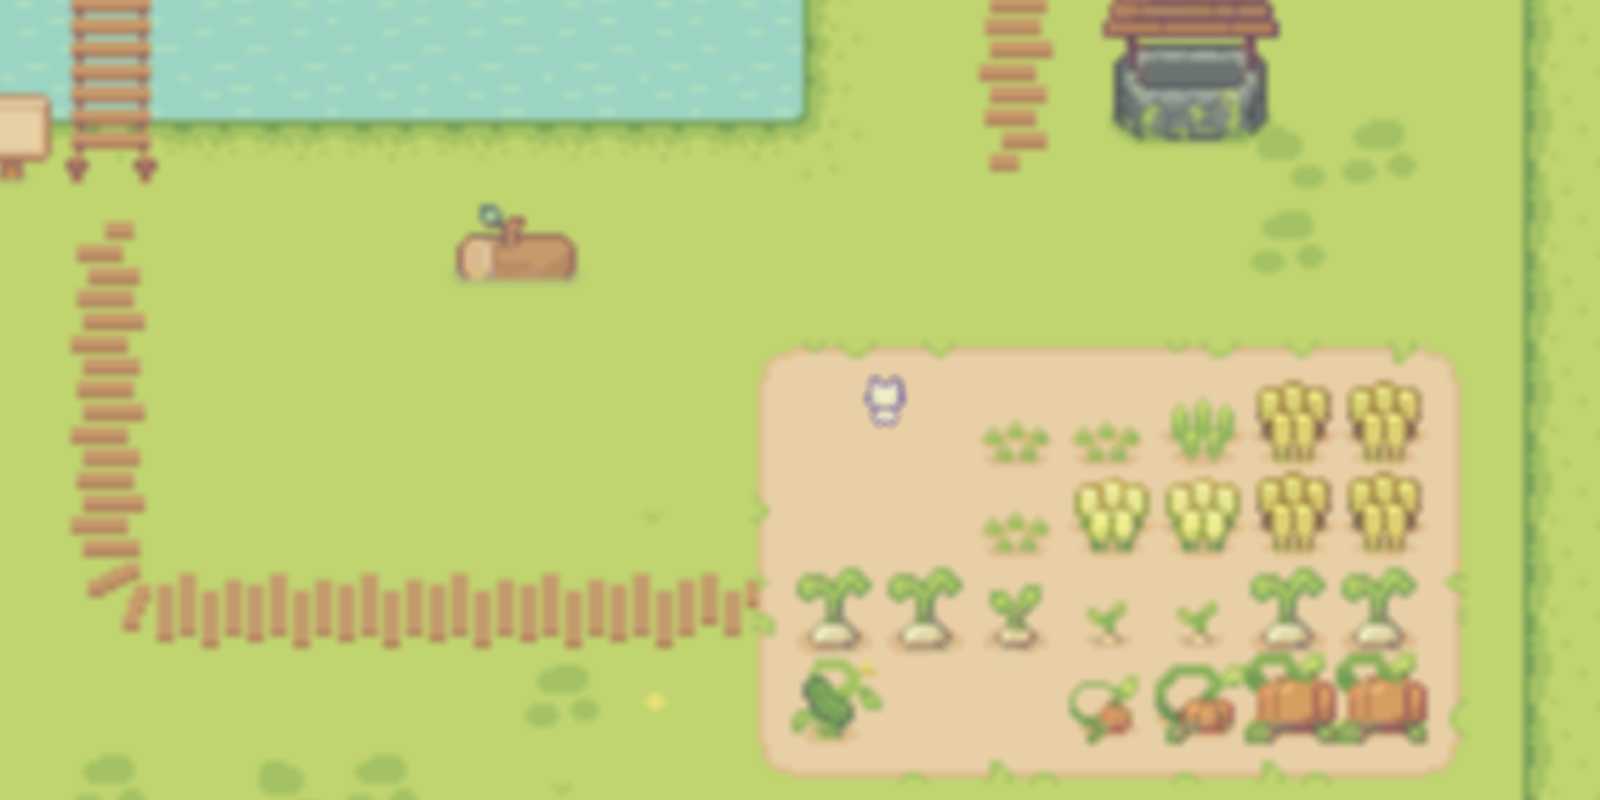
Since I’m not a designer and neither is my 5 year old son, we decided to browse around on Google to find assets that we could use for the game.
We were really lucky to find two packages that are pretty nice to build a farming game with. We designed our game around these:
There are a ton of free sources available on the internet that you can use for building games. We found that the following websites provide a nice catalog of game assets:
Some are payware, but most of the premium assets are really cheap. So if you’re remotely serious about your game development, I suggest you support the designers and buy a premium pack.
Summary
I guess this is one of those first in a series blogposts. We didn’t actually build anything yet. But we did decided on a particular approach to our game and set up the basics.
In the next part, we’ll cover how to start the level design. See you in the next part!